Monday 30 November 2015

EP Recording Plan

I’m starting to flesh out an idea for my first original solo recording and I thought I would post the process as I go on this blog. I’ll be taking it from the very beginning with the songwriting stage, through pre production, recording, mixing, mastering and distribution.

This has been something that I’ve wanted to pursue for quite some time but I’ve haven’t had the time, commitment or confidence to pull it off. Now, as I’m looking to start performing solo, I figured it would be a perfect time to get my ass into gear and get a decent recording off the ground.

This blog is really just to give an overview of how I plan to tackle each of the tasks that go into the process. I think it’s good to have a basic plan in place so that you can check where you’re at in the scheme of things to make sure you don’t go too far off track


Songwriting

I’m planning on releasing an EP of just 5 tracks. I decided not to do an album, mostly because of the extra time that it will take, and also because I’m looking at having a similar instrumentation for each of these songs and will probably change the instrumentation on the next group of tracks.

My first task for the writing of this album is to get 20 songs written and then choose the best ones from there. I’m going to be trying to use similar techniques as I did for my 1 hour songwriting challenge that I made a few weeks ago. Check out that post here: http://lockyberesford.blogspot.com.au/2015/11/songwriting-when-theres-no-inspiration.html

I’ve already got the 7 songs that I wrote for that challenge, so there’s only 13 more to go for that section of it. I’ll be uploading the rough drafts of the songs onto a SoundCloud playlist that you can check out here: https://soundcloud.com/locky-beresford/sets/songwriting-demos-for-ep

Once I’ve finished that section of the writing stage, I’m going to pick 10 tracks to continue with. With those tracks I’ll look more into the lyrics, melody, structure and chords and record slightly more polished demos. 

From there I’ll spend a bit of time listening to those tracks and pick the final 5 that will make it to the pre production phase. This is where things start to get a bit more fun.,


Pre production

This is where I’m going to be coming up with the arrangement of the tracks and really getting a vibe of how the track will sound at the end. Many of the parts that are recorded during this phase will most likely end up on the final recording, so I’m going to go quite in depth. The main thing though is that this will be done just from my bedroom.

First step will be picking reference tracks for each track. I’ve talked quite extensively in previous blogs about the importance of using reference tracks and how I feel that you should use them starting earlier in the production stage. This will take a bit of time as the sound of the reference track should represent a similar sound to what I want to end up with


During the preproduction phase, I will have all of the sounds down that I will want to have in the final mix. The difference will be that I’ll re-record many of the acoustic instruments and vocals in a studio with a nice sounding room and some top notch microphones.

It will be important to make sure the tempo is right, and all the parts are arranged and ready for the studio phase. This means it will take the most time and be the most integral part of the process.

For these tracks I’m going to be keeping a very acoustic instrumentation. Because I’m a guitarist/singer, acoustic guitar and vocals will be the main parts of each track. I also plan to use piano, bass, a stomp pad (instead of a kick drum), a floor tom, shakers and tambourines, and maybe some electric guitar. I’ll be adding string sections, organs and synth pads in the box to flesh out the sound.


Recording Studio

This is where I really get to have fun. I’m going to book out a day in the recording studio that I usually work out of. It’s been many many years since I got to sit on the other side of the glass, so this is going to be really fun for me. I’ve got a friend who’ll be taking on engineering duties with this one.

The place that I’ll be using is a great studio up north of Melbourne. It’s got a nice big live room with church-like ceiling and great views of the hills. It’s the sound of this live room that I’m most interested in. 

I’ll be using this studio to record all the acoustic guitars. There’s a nice big grand piano in the studio that I’ll use for all the piano parts. The studio also has some great microphones for recording vocals that I think will sound great on this recording.

Once those main parts are down, I’ll be looking at recording the floor tom parts as well as any percussion sections that are there too, pretty much anything that involves a microphone. However, because it’s only one day, if we don’t have time for those parts, I don’t have any problem recording them at home.


Mixing And Mastering

I’ll be taking care of all the mixing and mastering of this project at home, trying to keep the budget to a minimum. I plan on getting a lot of the sounds as I want them in the final mix, so hopefully there’s not too much to do in the mixing phase. 

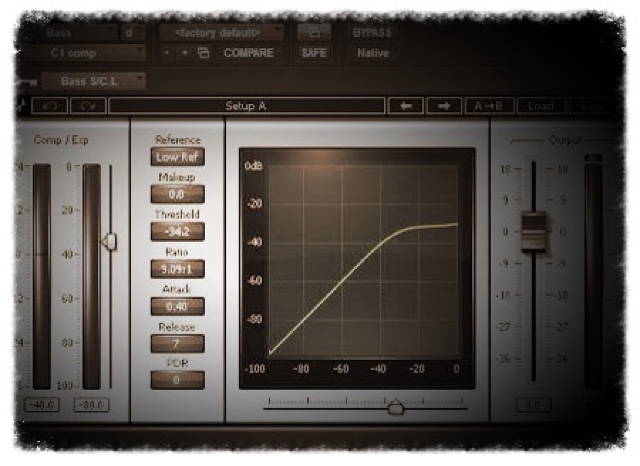
Due to my using a top down approach to mixing (using processing on the mix bus to get the sound you want from your master), mastering shouldn’t need much more than a mastering limiter to bring the volume up to a commercial standard.

I will be creating my own artwork for the EP as I want this to be an all around creative adventure. I’m still not sure in what ways I’m going to distribute it yet, but it will definitely be available on iTunes and all that. I’ll hopefully also print some CDs as well.


So this is the start of my journey producing my first solo recording. Please subscribe to my blog if you want to follow my progress or see what else I have to say. Feel free to make comments, ask questions or tell me about your own creative adventures in the comments below.


Friday 27 November 2015

Making of my Soundtrack Piece, Woman.

Yesterday I entered a song into a competition put up by Adam Audio. The idea was, they give you a choice of 5 pictures, and you compose and record a 30 second soundtrack to one of your choice. The main prize is a special edition set of their A77x monitors, which look pretty sweet. 

Check out the comp here: http://www.adam-audio.com/en/soundtrack
As much as winning those monitors would be awesome, I was really excited a
bout the idea of creating something a little bit different from what I’m used to in the studio and making a track a little more cinematic. So I went about creating a track for the picture which had a woman in a white dress out in the wilderness.

I’ve learnt quite a bit about production, songwriting and engineering over the last few months and I wanted to put some of it into practice. More than that I wanted to learn a few things about a different style of writing, so this project was a lot of fun for me.


Picking a Reference Track

One thing that I’ve been trying to get into the habit of a bit more is picking a reference track from the very beginning of a project. I do this because you have a constant source of reference from the beginning of the track, rather than trying to fix your mix to the reference at the very end of the process. 
Check out my blog on reference tracks here: http://lockyberesford.blogspot.com.au/2015/11/using-reference-track.html
This is the first project where I’ve picked the reference track before even laying down the first instrument. I had the idea in my head of what I wanted it to sound like, but I was going in with a fairly fresh head sound wise. I wanted a sound that was a bit raw and natural. I was trying to avoid anything too electronic and I wanted it to be floaty.

I ended up choosing Florence And The Machine’s “Cosmic Love” for the reference track. It has a similar instrumentation to what I had in my head and, as a bonus, I’m a really big fan of the sounds on that record. Plus the picture reminded me of Florence, so it worked out well.

Having the reference from the very beginning was a huge advantage. From the very first track, I compared to what the reference was doing and, as a result, stayed on track during the recording process. For each decision I thought about making, I’d do a quick AB comparison of my track and the reference and it really cemented what I really needed to do to the track.

Getting tones was a lot easier too. I often ask myself if something needs a bass boost, or compression or distortion. And having the reference there while I was dialing in tones, it became very apparent what was necessary and what wasn’t.

The biggest advantage during the whole process was my confidence in making certain decisions. I was able to make big calls, like printing all my processing and recording with reverbs. This saved a lot of time sorting through the tracks later and picking verbs in the mixing stage.

As a result of this process of checking the source tones to the reference as I was tracking, by the time I got to the mixing stage, it was all done! This was an awesome thing to experience. Finishing the tracking process and having a mix that’s 90% done. There was only a few tweaks here and there, a bit of buss processing and then mastering.


Starting With Guitars

The base of this track revolves around a guitar part that plays a simple triplet pattern that goes between Em and G. I recorded this using my maton guitar plugged into my Axe FX 2. I used the acoustic guitar because I wanted a slightly woodier sound, but then used the Axe FX to put in the amp modeling and effects that I wanted for the track.
My Axe FX signal chain went like this:
Filter > Compressor > ¼ Note Delay > Mr. Z MZ-8 Amp head > 1x12 Studio Cab (87a mic) > Large Cathedral Reverb > Filter
One thing that was really interesting while I was getting the tone for this while referencing the Florence track, was how much bass and treble I took out. I had the filter low passing up to 91Hz and high passing all the way down to 2K, the bass and treble turned down a bit on the amp head, another low cut up to 136Hz on the cab and a low cut on the final filter that was up to 158Hz. This was a bit of an eye opener because I realised how much low end can sneak into a mix, and then trying to get rid of it at the end of the process can be a bit of a struggle. Getting rid of it at the source helped avoid trying to demud a muddy mix.

The bass provided single notes that emphasized the chord changes and decayed over time. Again, I was surprised with how much filtering I did on account of the reference track. I ended up high cutting down to 2.6kHz at the start of the chain and low cutting up to 170Hz and the end. That’s a massive low cut for the bass guitar, but it sounded right.
My Bass Axe FX signal chain went like this
Filter > Compressor > Pitch (adding a 2 octave down double) > SV Bass Head > 8x10 SV bass cab > Filter.
Adding the sub harmonic down 2 octaves on the bass was a really good way to add body to the sound that made it a bit larger than life. Although you never really hear the fundamental of that sub, the harmonic content shines through and gives it something special. I recommend playing around with octave shifts for changing sounds up a bit.

The outro guitar was a bit different to the main guitar. I used the same acoustic, but I ran in through a Twin Reverb sim and also added a pitch effect called “Crystals” which adds delays an octave up giving it that sparkly fairy sound.


Percussion

Next up I added some percussive elements to the mix. I used Superior Drummer with just the basic drum kit that comes with it. I gave a similar feel to the Florence song, using only kick and toms through the majority of it. I messed around with putting some snares in but it sounded a bit out of place.

I really wanted the drums to sound natural, so I avoided writing in the midi. Instead I played the parts in using my keyboard. This worked out great because it gave a really human element to the sound. I played the kick part first and then recorded the toms in afterwards. 

I’m not the best at drums or keys, but I played it through enough times to get the right feel, and then listened to the track a few times and if there was a hit that was out of time or the wrong velocity I’d change that one hit slightly and leave the rest to keep that human element.

Next I added in some shaker. This was the only sound on this track that was recorded using a microphone. I just used my Beta 58 for this because it was already set up. It’s not the best mic for shaker, but it’s a background instrument and it does the job. I supplemented this with some ride that plays fairly quietly to balance the sounds.

The outro features some huge timbali tracks as well as orchestra hits. This gives the outro a hug feel, and though these elements aren’t mixed very loud, they certainly give it a bit more of an explosive sound.


Piano, Harp, Strings and Organ

The use of the high piano and harp sounds that a panned left and right has a very similar feel to the Florence track, but I feel works really well to give a bit of that fairies in the woods sound that I was going for. They are doing polyrhythmic patterns that interplay with each other quite well. I used Avid’s Mini Grand for all the piano tones and Xpand for all my orchestral sounds.

There’s another piano part playing chords that just add a bit more rhythmic structure to the song. There seems to be a lot of polyrhythmic sounds, so it’s good to have the sound structured using a piano with a nice strong attack.

I have an organ and a lower string section providing pads on the left and right of the track. These really add a bed to the track that I wouldn’t have thought about if I wasn’t listening to a reference to see what I was missing. The organ just plays the chords progression and the strings a doing a simple melody around the chords.

The lead sound is a fairly basic lead violin that I got from Xpand. I added quite a bit of high end excitement and harmonics to this sound because I wanted it to mimic the vocal sound in my reference track. When I was doing it, it felt like it may have been a bit too much high end boost, but when I took it out the track sounded a bit dull and lifeless.

Finally, I added a Shimmer pad to breath some air into the track. This is an Xpand synth sound that I ran I high pass filter on to just get the very top frequencies and fill out that end of the spectrum a little bit more.


Play It In and Commit

Although this was made using almost only plugins, I really wanted to keep a human element. I decided from the start that I would play in all the instruments using the keyboard, like I did with 

the drums. The great thing about this is that you get that human feel, and a lot of the time it’s quicker than sitting there and typing in midi notes… and it’s a lot more fun. Plus you get better every time you do it and it becomes easier to play almost any instrument on a piano.

The other side of this is to know your weaknesses. I am not a very good pianist yet and I had a few notes out of time and a velocity I didn’t like. Rather than quantize it all, I decided to get the best take and listen through until I found notes I didn’t like and only change those notes to keep as much human element in it as possible, without leaving a bad sounding take.

After I finished each instrument, I wanted to make sure I was completely happy with it before moving on. I wanted the performance, EQ, and reverb to be as close to perfect as I could get it so that the next part that I recorded would fit into the mix right and I wouldn’t have to fix it later.

One thing I did was print each of my instruments after I had it how I wanted it. I bussed the Instrument track to an Audio track and recorded in with all the plugin settings set and then disabled and hid the instrument track.

This meant that I had to think a little bit more about the sounds and get out of the “fix it in post” mindset. It also meant that I was left with a very clean session that had very few plugins running so I knew I wouldn’t run out of processing power. I did keep the tracks in the session, and occasionally brought them up again to make a change and reprint it, but it was very little hassle.


All in all, this was a great project to do. I learned so many things from it, and hopefully with win the main prize.


If you have any questions on things I did on the track, comments on what you would have done differently or want to share your track with me, put it in the comments below.

Tuesday 24 November 2015

Songwriting When There's No Inspiration Pt. 2


So a couple of weeks ago I wrote a blog setting up a challenge to myself and anyone else that feels like participating. The challenge was writing 7 songs in 7 days and only allowing yourself one hour to write the lyrics, melody and chords AND record it (not professionally of course, just the basic demo.

I suggested some different ways that you could force yourself into some inspiration when the ideas weren’t just coming to you and for each song I wrote I tried one of these different techniques. The recordings that I’m putting up here are by no means final products, or even decent demos, they are just the live recording I got at the end of each hour of songwriting and they’ll need a bit of attention should I end up using them in the future… which I probably will for some of them

Anyway, here are the tracks that I’ve recorded and a bit of description of how the writing process went and what I thought of it.
All of the tracks are available on my Soundcloud here:https://soundcloud.com/locky-beresford/sets/songwriting-challenge-tracks


Song 1 - Push It Away

This was the first song I wrote for my 7 day challenge. I used the technique of facing myself up against a wall, playing random chords on the guitar and singing random noises until words formed into something coherent. This actually worked a lot better than I thought it would. I came up with the main part of the verse first, with the “I don’t know” line being the only actual words and then came up with the rest of the lines of the first verse. 

I didn’t have any kind of theme in mind for this song, but after I came up with “Can I make it up the stairs”, It kind of fell around the theme of someone stumbling to bed after a big party at their house where everyone else had left. The chorus didn’t really make sense with that that idea, but it worked with the sound I was going for at the time. 

It turned out that I had all the lyrics and main chords finished in about 25 minutes, which I was really surprised with when I saw the time. I then spent another 25 minutes making slight changes with the vocal melody, bridge chords and guitar lead line. The last 10 minutes were spent recording it and that was it. Success.


Song 2 - Slowing Down

This track was written using the technique of listening to a song and waiting until original ideas jumped out. I used a track by the artist Matthew Good called “Sons And Daughters”. As soon as the track started, there came a guitar lead line that sounded to me like a vocal phrase and I subsequently wrote the chorus of my song based on the “words” I heard in the guitar line.

Most of the rest of the vocals came about when I heard a vocal line in the song and I came up with a line that I thought sounded really cool after it, but wasn't actually in the song. I fleshed those ideas out a bit and came up with what ended up being the verses. 


Song 3 - A Better Way

With this track, I used the technique of changing instruments to write a song. This is a great technique as your limited knowledge of the instrument acts as a restriction and you come up with different ideas than you might on your main instrument. 

I used a keyboard, which I have dabbled in and basically taught myself to play but I am still very much a beginner on it. I started out by coming up with the verse riff on the keys and then the melody and lyrics for the verses quickly followed.it was interesting to go straight to the Cm chord at the start as I would rarely use that on a guitar riff. Then moving to the Eb is something I'd almost never do without a capo so it was good to get there from the start with the keys. I then had to come up with a chorus, which came about quite easily. 

I actually ended up finishing the writing process of this song in about 20 minutes, which felt great. The tough bit that took up the rest of my time was the recording, mostly because I'm not very good at keys and it took a while to get it to sound the way I wanted. In the end I got a very different sound to what I normally end up with which was a bit refreshing. 


Song 4 - Skin

This track was made while listening to an instrumental track and then coming up with lyrics and a melody based on that. From there I worked on a chord progression based on the melody that i’d come up with. This was particularly interesting because the song that I was listening to had some odd time signatures. 

Although I didn't follow the time signatures in the song, I did end up using some slightly different timings and found myself switching between ¾ and 4/4 quite a bit. I'm not sold on the chorus, although there is something I like about how rushed and frantic it seems to sound when compared with the rest of the track. If I spend more time on this one I think I'd be reviewing the lyrics that are in the chorus to something that flows a little better. Maybe also change the chord progression. 


Song 5 - You And Me 

For this track I used the brainstorm chart idea. This is a bit different to what I've been doing in that the lyrics came before any music at all. As a result, I ended up writing words that didn't seems to flow in a musical sense. I can understand that some people have a better knack for this than I do, but I really wasn't feeling that this technique got me very good results. 

Another thing I noticed was that actually coming up with the lyrics took a lot longer than in the previous songs, which left me very little time to come up with chords and melody, and then record the track. I would definitely be rewriting a lot of the lyrics and reviewing the melody and chord progression of I chose to pursue this track, but as it stands, I think this one will end up going in the bin. 

I think the brainstorm chart idea would work better if you have a subject that you really wanted to write about (or you were getting paid to write about a specific thing), but for me it brought up a mediocre song that took a lot longer, and was less fun to write. Maybe I'll review it again later on. 


Song 6 - The Wall

For this track, I decided to experiment with a loop pedal. There's one that comes with my Acoustic Play that is very basic but I'm sure there's programs that you can download that have more functions. Being new to the looping world, simple was good for me. I have the options to record, play, stop, overdub, and delete the last overdub. That's all I really needed, and it was a quick process of writing very much on the fly while not screwing up the loop too much. 

I did like working this way and it ended up giving me a track that was a bit different in vibe to what I usually make. I'll be looking at playing with my loop pedal quite a bit more in the near future and trying to get to know it better and hopefully writing some great music using it. I definitely recommend using these things if you love just sitting down to make music and seeing what comes out.


Song 7 - Believe

This track I used another track to get my finished product. The idea being, that you use lyrics to a song that you’ve never heard before, make up the chords and melody that you think would fit with those lyrics, and then replace the words with new ones. 

For this one, I used Damien Rice’s song “The Greatest Bastard”. Having never heard the song, I played around with the melody a bit until I came up with something that I thought fit the lyrics and then built the chords around that. I mostly followed the structure of the song that was listed out on the lyrics page and played until I had essentially written the music to these lyrics. Once finished that I played over the chord progressions and hummed out the melody until my own words came to my head and soon enough I had the lyrics for the whole track there.

This was a great and fun way to come up with a song as it changed my subject matter up a bit as I was influenced by what he had written in his own words and how the lines were structured. It was also really interesting looking up the song once I’d finished and hearing how different the original version was to mine (I also recorded a version of the song with his lyrics for future reference.


Final Thoughts

I really enjoyed this challenge and it gave me a new perspective on the writing process and some of my strengths and weaknesses when it came to songwriting. One thing that I really noticed was that ideas came easier to me when I was playing music and coming up with lyrics ideas on the spot rather than just writing lyrics while absent of any kind of music. Some of these techniques worked really well and I think I’ll be using these a lot more in the future.

What processes do you find most effective when writing songs? What do you think of my tracks? Have you learnt anything new from trying any of these techniques? Let me know in the comments below

Saturday 21 November 2015

How Should I Better My Performance?


So, I had a gig on Friday night. It was a solo acoustic covers job at the local pub, the kind that I've done many, many times before. I love playing these gigs, but I feel like my show is getting a bit stale and I thought I'd try a few new things to get more from the experience.

In almost all of these gigs that I've played before, I would book the gig, make up a similar poster on photoshop, make an event on Facebook and promote to my friends. Then, on the day before, or the day of, I’d change my strings, pick the songs from the iPad and quickly go through a few that I wasn't sure of and that would be it. I'd get to the gig, quickly set up, play the gig while getting heckled by my friends and then pack up and go home. 

This time I wanted to do things a little differently. I wanted to make a GREAT show. I wanted to try some new things to improve myself and I wanted to mix things up a bit. Not only to try and make things a bit more fun and challenging for myself, but to find new things that might work in the future.


Stand Up!

One of the things I decided a bit earlier on in preparation for the gig was to change how I was performing. Every show I’ve done previously, I’ve been sitting down. There was no real conscious decision to play sitting down, it was just for natural. I kind of saw myself as background music, so I figured that being small and in the corner worked for me. I had made a Cajon that I would sit on and play using a kick pedal to make the beat for my sound.

The problem with that was that I tended to shy away a bit too much. I became the background music in the corner and would be less likely to chat to the audience, and less likely to get into the music I was playing as much. It became apparent that if I wanted people in the crowd to be more interesting, then I’d have to be more interesting.

So I went out and bought myself a stomp pad and got a strap for the guitar. The stomp pad is a great little device that gives you a bit of percussion during your set by just tapping on the pad with your toe. This particular one is called a Wazinator, and it’s a big flat piece of wood with a hollow section in the middle. At the end the hollow part funnels into a speaker driver that then has an output jack attached to it. This means that the woody tone of your tap then shoots into the driver, where you can then plug it into your PA system.

Standing up was a bit of a change. I’m used to standing up while playing electric guitar, but haven’t done it much playing acoustic. Trying to tap along to each song was another challenge, as if you try to do it for the 2+ hours of playing time, can get a bit tiring, but we persevere.

I found that standing up really brought my performance up a notch. I felt that I had a better connection to the audience, I wasn’t staring at the lyrics too much and I just had more energy and more fun on stage. That’s going to be a definite change that I’ll continue with and would recommend it for any performer looking to add a bit more pizzazz to your show.


Get a New Promo Pic

For this one, I actually didn’t take a whole new photo, but I played around with photoshop to make something a little bit cooler and interesting than just a picture of myself. I knocked this poster up in about an hour, just using a couple of pictures taken by my Dad (who you should definitely check out at www.snapped.com.au) and played around with filters and blending options until I got a cool result. Having something a bit more artsy encourages people to look a bit more and see what’s going on, and hopefully make you a bit more memorable.

As far as the rest of the promo goes, I didn’t go too far different to my normal attempts. I made the Facebook page and promoted it in any way I could, I put up posters at the venue and I texted all of the contacts in my phone for the ten-thousandth time to come to my gig. 

If it was original music, I could probably go a bit further, take an ad out in the local music classifieds and pay for Facebook advertising, but for a covers gig, it’s probably not worth it. Plus, this is to make money, and you don’t want to spend all the cash you get before you hit the stage.


Engaging The Audience

I made a conscious effort to chat to the audience this gig. It’s hard sometimes when noone is paying attention. For the most part I only had 4-6 people in the room, but it’s important to try to make it work with those people. While playing, I tried to make a note of introducing each song before I played it, talking a little bit of banter about each song and telling some terrible jokes.

Give the audience a say in your set. During the break I thought I should take my iPad with all my lyrics and chords out to the crowd and let them choose a few songs that they would like to hear, without having them yell out songs that I don’t know throughout the set. This worked out great! I got a bit of interaction with the audience, they got to hear some songs that they like and everybody had a better time because of it. One of the guys in the audience actually said “We were going to go home, but when you came out and gave us a view of the set, we had to stay”. What better feedback can you get?

This wasn’t exactly intentional, but I managed to get one of the more drunk audience members up for a sing-a-long. He got up during Tenacious D’s “Tribute”, which worked out well because he did the voice of the Devil. He was a decent singer, which helped, but it’s understandable that sometimes these kind of things can get out of hand where drunk people want to stay up all night on the stage, but getting up for a song is alright. Especially if it’s something with 2 parts (Grease, anyone?)


Finally, you should try to chat to the audience members as much as possible. Before the show, during the breaks and at the end. Sometimes it’s easier than others, but if you build a rapport and a regular fanbase, it’ll get easier and easier. 


Filming yourself

I really wanted to make the most of this gig. I wanted to get as much out of it as possible, so I thought it would be a good idea to film/record it.

I did this for two main reasons. One was to use as a reference for myself to see what I needed improvement on. I can watch this back and go through each of the songs and see what I should change in my performance of the songs. It’s easy to pick up little mannerisms that you don’t notice yourself until you watch it back. So from my posture, to my performance, to my banter, I can really scrutinise how I perform.

The other reason I recorded myself is to have some content for more advertising and online presence. I can take the tracks I recorded (at least the ones that are any good) and release them one at a time on Youtube. This gives me more likelihood of growing an audience on the internet, and if potential venues want to see that you can perform well live, you can shoot them a link to your Youtube page and they’ll see all the tracks that you’ve got up there.

This can be a little harder to do because you’ll need a certain amount of equipment to do it and I may have gone a little overboard. I ran a computer using my TC Helicon Acoustic Play as an interface and recorded my vocals and guitar using Reaper. I then had the stomp pad running DI into my Zoom H4 that was also recording a stereo of the room sound. This meant that I have quite a bit of sound to works with. Unfortunately, Reaper did a bit of a weird thing where it cut out bits of track every so often in the recording, which meant I had to go through the whole thing and edit it so they lined up perfectly. I think next time I’ll just run directly into the Zoom recorder, as it’ll be a bit smaller and easier. Film wise, my friend just brought along a handheld camcorder and that worked great to get a decent image (I’ve got my own camera on the way thanks to my lovely girlfriend).


Tell me, how do you perform? Do you have anything you’ve changed in your set to step it up a notch? I’d love to hear from you guys in the comments below.

Wednesday 18 November 2015

Compression and Your Ear


Dynamic compression is a common ingredient in all mixing as much as it’s a subject of debate. Many studio buffs argue about correct use of compression and there are forever new techniques and tips on how to get the most out of your studio’s mysterious tool. But why are compressors so important? I hope to shed some light on this fairly basic concept that tends to confuse so many.


What Is Compression and How Does It Work?

This is the very basics of compression so if you’re a bit more advanced, you may want to skip this section. 

In its most basic form, a compressor is an automated volume fader. The way it works is that all volume that exceeds a certain threshold is turned down. This means that the overall volume can be turned up so you can clearly hear the quieter parts of sound source without the louder parts being too loud. 

There are many parameters that you can change on your compressor that alter how it affects the sound source. 

Threshold: This controls the limit at which the compressor becomes active. A higher threshold means that only very loud sounds are turned down, where a low threshold will affect much more. 
Ratio: This determines how much the sound exceeding the threshold is turned down. With a 2:1 ratio, a sound that exceeds the threshold by 10dB will only output at 5dB above the ratio. With a 10:1 ratio, it would only be 1dB output. 
Attack: This determines how quickly the compressor reaches it’s full gain reduction once the threshold is exceeded. 
Release: This determines how quickly the the gain returns to full once the threshold is no longer exceeded. 

These are the most basic descriptions that I could come up with but there is plenty of literature all over the internet that goes a lot more in depth with the function and controls of compressors. 


Uses of compressors

There are many ways that compressors can be used and there are compressors are better than others for each type of compression. 

Levelling: This is where you are simply trying to level out louder sections of the source to the quieter ones. It could be in trying to get all the kick drums hits to be at the same level, a vocal to be consistent throughout the performance, or getting the your whole mix to be heard with the quieter parts dropping out less. 

Thickening: This is where you try to change the sound of the source by compressing the envelope. Usually involving a fast attack and release, an extreme version of this is a distorted guitar sound. 

Adding Punch: This is almost the opposite of the normal function of a compressor, but if you slow down the attack enough, you can actually expand the sound envelope of a sound. This technique can be used to boost the strike of the sound and then have the compressor kick in to pull down the sustain. 

Limiting: A limiter is just a compressor that has a high ratio. Usually a ratio of 10:1 or higher is considered to be a limiter. Limiters usually use a fast attack and release and a high threshold. Limiters are usually used in the mastering stage in order to get a track louder while ensuring they never hit zero dB which would cause digital clipping. 


Why Use Compressors?

This is where this gets a little more interesting and we learn why we should use compressors in our mixes. 

Most people agree that a well compressed signal sounds better, but most people can’t explain why. There's a lot of anti-compression people out there right now that are fighting compression in music, but many of them don't know what they're talking about. Many people confuse digital file compression with dynamic audio compression and see them as the same thing, but they are completely different. I'm also not talking about the “loudness wars” slamming of modern tracks which is essentially an epidemic of music that involves over-limited in order to make it comparably louder than other tracks, at the detriment to its musical integrity. I'm just tackling artistic compression. 

The reason that we find a compressed sound more appealing than a more dynamic sound has to do with the anatomy of our ears. On the journey from our eardrums to our brain, sound waves go through three different biological compressors (and 4 EQs) in the middle and inner ear. One of them, the cochlea, even acts as a multiband compressor. These natural compressors work together to give us an amazing hearing range and help us decipher different frequency bands. The difference between the quietest sound we can hear and the limit at which our eardrums rupture is approximately 100,000,000,000,000:1. This makes the pressure of the loudest sound 100 trillion times bigger than the quietest sound. 

Here’s a more in depth article on the functions of the ear. 
https://www.soundonsound.com/sos/mar11/articles/how-the-ear-works.htm

What does this have to with mix compression? Why would we need compression in our mix with so much natural compression? I'm glad you asked! Sounds that are louder in our ears are subject to higher in-ear compression. Therefore, we associate loud music with more excitement and intensity. So, when we hear a mix that’s been compressed, it sounds loud and exciting, even if the actual volume isn't that loud. 

The problem is, when some mixing engineers pull up a compressor on certain tracks, they don't have a vision of why they want to use the compressor. I

It's been said time and time again, but always check that your compressor isn't adding any extra volume to your track and just check, using the effects bypass, that your compression is making the track sound more exciting. If it's not, change the settings or ditch it. This is also a good argument for mixing at low level, as you aren't being distracted by your in ear compression. If it sounds exciting at low level, it'll sound amazing loud. 

How do you use compression? What is your favourite compressor? Has this article made you rethink your use of compression? Let me know in the comments below. 

Sunday 15 November 2015

Using A Reference Track


I find that it's very common for mixing and mastering engineers to use a reference track in the final stage of their project to make sure that they're on track with what's going on in the rest of the music world. I believe that we might be bringing the reference tracks in a little bit too late and there's something to be said about using a reference earlier on in the music production process. 


What Is A Reference Track?

A reference track is essentially a song that you compare the song that you’re working on to make sure it sounds right. Usually, a mixing engineer will use a song that is in a similar style to the song that they're working on to make sure it sounds good in comparison.

This is a very important step in mixing. As mixing engineers, we spend a lot of our time listening to the same song for hours on end. Our ears have an amazing ability to adapt to situations that we’re in. If you are in a very bright situation, your ears will EQ themselves over time to level out the frequencies so that they sound normal to you. If you are in a loud situation, your ears will compress the sound and it will only be when you hear a quieter sound that you realise how loud it actually was. You may notice when you’re at a gig, a new band might get on and you’ll think “dayum, that is a harsh guitar sound”, but after a few minutes of hearing the same sound, it starts to sound normal.

The same thing happens when you're mixing a track. You are listening to one sound for many hours on end. You will find that if you spend hours mixing one track without listening to anything else, you'll run it off and put it next to another track and the whole vibe of the mix will be completely off. This is where the reference track comes in. If you A/B the reference track next to your mix, you will hear what the differences are between your track and a track that is commercially ready. From there you can make steps to “fix” your mix to get it to a commercial standard. 


Bring It In Earlier

The thing that I’ve noticed is that many mixing engineers will bring in the reference track towards the end of their mix. They’ll spend hours and hours getting the mix to a point where it sounds exactly how they want it while their ears adjust to the sound of their song, as well as their room and their speakers. Then, once happy with it, they’ll play their reference track and realise how far off they are from what they had in their head. This is where, usually, extra plugins are added, huge EQ sweeps are made and half of the hard work is undone in order to make these two, completely different sounding mixes to sound the same. It sounds a bit counter-intuitive, doesn't it?

So what if we bring in the mix at the very start of the mix? If we pull our very first, most basic version of the mix while referencing a track that we know sounds great. Then, as we make any adjustments to our mix, we check with our reference track to see if it's still on track. There’d be a huge change in how we mix, the amount of plugins we use and the amount of time we spend mixing. If we mix towards a sound that we believe to be good, our biggest mixing decisions will be geared towards getting our mix to sound good and many of the tedious, arbitrary decisions will be left behind and the song will usually end up sounding better quicker. 

One of the problems with this technique is that, in the mastering process, big limiters are used to boost up the volume of a track. If you try to mix your track that loud, your plugins will not be running optimally and you’ll be introducing a lot of digital distortion. I find that it's best to mix quieter, with plenty of headroom and let the mastering engineer (even if that's you) bump it up later. Start by bringing up your kick sound so that it’s sitting at about -20dB on the master track level. Then start A/Bing the reference track and then bring down the reference track fader until the kick on the reference track is the same level as yours. From there you have set the level of what your track should be and try not to go much louder or quieter than that. If there's no drums, you can use the lead vocal or any other pivotal sound that is present in both tracks. 


Bring It In Even Earlier

So, we agree that it's better to have a reference earlier in the mixing stage to avoid the “fixing” syndrome. Then what happens if you bring in the reference track even earlier. What if we use a reference track during the recording phase? When you set up the microphones around the drum kit at the very start of the session, check it against the reference track and see if it's in the ball park. Is the kick beefy enough? Are the overheads well balanced? Are the toms too dull? These questions will all be easier to assess with a reference track at hand and you'll be setting yourself up for a great final mix from the start. 

I find that biggest difference to be made by using a reference track is in the guitar and bass tracks. Many times I've gotten to a mix, listened to the guitars and found that they're too dull, too fizzy, too driven, or not driven enough. Then I have to go through the process of trying to fix these guitar tracks using EQs, compressors, distortion, exciters etc. in order to get the guitar to sound the way that it should have been recorded with. If, in the recording phase, you put the guitar sound that you're recording against a reference that has a guitar sound that you really like, then you know that when you get to the mixing phase, the sound will require very little “fix mixing”. 

Finally, using a reference track will determine if your song is actually finished at the end of the recording phase. How many times during the mix have you tried to fill out a dull sound will reverb, EQ or samples? You should know by the end of the recording phase if your track is finished or not. If you check against a reference track and your chorus sounds a bit dull, you'll have a much clearer idea of what you need to brighten it up: a shaker track, a guitar lead, harmonies etc. 

Picking Your Reference Track

There's only 2 things that you should consider when picking a reference track to mix to. First, is it similar in style to the track that you're writing? There's no point in referencing a black metal track when mixing a country ballad. Try to keep the instrumentation similar and reference sounds that you want to use in your track. It's common to use more than one reference track but it’s best not to go too extreme, otherwise you spend half your time flicking between tracks. Secondly, do you like the track? It sounds logical, but make sure that you're referencing a production sound that you really like. 

Using reference tracks from the start of your recording process makes sense. It's like a map to your final destination that you can check frequently as you go. Using a reference at the end of the mix is like driving in the vague direction of where you're going and, when you think you might be close, checking the map to see how far off you were and then taking whatever back roads you can find to get back to where you were. 

What do you think about using reference tracks? What’s your process? Did this article help you? Let me know in the comments below. 


Thursday 12 November 2015

Rethinking Guitar Tuning


Have you ever thought about how you tune your guitar? Ever sat down, flicked on the tuner, got that little green light lit up on each string, only to hit your first chord and thought “well, that ain’t right” and then put it down to it being in your mind. After all, that piece of equipment is built for this purpose. Of course it’s right… right? This is how I used to tune, whether it be for practice, during a gig or in a recording. But there’s a better way to go about it. In my years in recording, I’ve picked up a bit of knowledge about getting the tuning right on a recording and I’m going to share the basics with you here.


Everything isn’t as it seems

When you pluck a guitar string, hit a note on a piano, hit a drum or play any instrument that is percussive in nature, the pitch of the note you’re hitting doesn’t stay consistent throughout the course of the note. This has to do with the physics of how sound is made: you have a certain length of string at a certain thickness that’s tuned to a certain tension and those 3 factors give you your strings resonant frequency when struck. 

The difference comes when you actually hit the string, the distance the string moves up and down at the start of the note is more than what it is at the end. This added movement means that the string has more tension at the start and therefore the note will be higher at the start and then drop down over the duration of the note. You’ll notice this in an extreme sense if you plug into a quick, accurate tuner and hit a note nice and hard, the note might start sharp and then go flat. 


String Gauge and Scale Length

Different instruments, different string thicknesses, age of strings, instrument scale length, how hard you pick, pick thickness, using fingers: these all have an effect on how drastic your change in pitch is. This isn’t something that you can get rid of (it’s physics) but it is something you can tame. In general, more tension equals less pitch drop. Thicker strings and longer scale length means more tension. This doesn’t mean that you should go out and put the thickest strings that you can find, because there’s no use having a perfectly in-tune guitar if you can’t play the damn thing. It is, however, something that’s worth experimenting with, and if you use any kind of dropped tuning, you’ll find your tones and tuning getting better more quickly.

On my electric guitars, I tend to tune down the guitar half a step to Eb, and some songs I drop the low E down to Db. I’ve been experimenting with string thicknesses for a while and have been slowly getting thicker and thicker strings until I was happy with the tone and felt that going any thicker may affect my playing. 

Right now I’m using Ernie Ball 11-54 guage, which is pretty thick but I think sounds great. I use these on both my PRS SC-245 and Gibson BFG which have scale lengths of 24.5” and 24.75” respectively. These are quite short in comparison to most Fenders and Ibanezes which have a 25.5” scale length. So you’d find that putting strings that thick on a guitar with a longer scale length might make it a bit hard to play, but it’s worth experimenting with. 

Stevie Ray Vaughan was famous for using strings that were 13-58 gauge on his Strat, which is ridiculously thick but I’m sure his tuning was accurate and obviously his tone was great. If you are thinking about changing your string gauge, just remember that other things will change on your guitar that may need compensating for. Mostly your intonation, string height and truss rod. You may need to also look at your nut and bridge slots, sometimes it’s better to get a luthier to do it.

This is an Ormsby Multiscale Guitar
If you’re looking at buying a new guitar, scale length is something that you will definitely want to consider. If you’re planning on tuning down a bit, you will probably want something with a 25.5 or similar scale length. If you’re planning on tuning down to B, or even A then you might want to consider a baritone (27”) scale length. If you really want to get into it, you can look at Multi-scale guitars, which have different scale lengths between the strings and fanned frets.


How Do You Play?

As mentioned before, playing harder means there’s more raise in pitch at the start of the note, which means that there’s more drop in pitch throughout the duration. This means, the softer you hit, the more consistent your string pitch will be. Of course, hitting softer is going to change the vibe of your sound and may not get enough aggression and feel into your sound. It’s good practice to find a balance between the two. When you’re playing a part, record it a few times playing at different intensities. You’ll probably find that you can play quite a bit softer than what you are right now and it will sound a lot better in the context of the other instruments in the song, while still having enough attack and aggression.

Using a different pick will also change the amount of pitch drop that you get from each note. A thinner, softer pick will cause less string displacement, where a thicker one will give a harder hit, but again, this can affect the tone that you like. Experimenting with pick material is also very beneficial as it will alter what tone you get out the other end. Finally, the pointiness of the end will make a difference to the sound, as long as you compensate with your playing as you’ll find that you don’t have to dig in so much.

Finally it’s worth realising how you play and tuning to that. If you play more consistent, fast and hard picking parts, and you tune to the sustain of your note, you’re going to find that you’ll be sharp most of the time. If you have softer, held out notes, and you tune to a hard pick, then you’ll be flat. This is mostly for live scenario, but when you tune, tune to how you mostly play in your band because you can’t change how a string changes pitch, but you can take steps to try to be in tune the majority of the time. It’s worth mentioning that everyone in the band should also use this approach, because you can be as in tune as you want, but if the rest of the band is sharp, then you’re flat.


Note: Not what I really mean
Tune With Your Ear and Tune Your Ear

Most of the time, in a live situation, we don’t have the time to sit down and critically listen to our tuning, unless you want to create a very boring and awkward situation for your audience. In the studio, however, we have all the time in the world to get our tuning nice and perfect, and this will result in better sounding recordings. This technique means tuning your guitar to each part as you record it. An accurate tuner is great at telling you exactly what frequency your string is resonating at, but they don’t know the song you’re playing to and can’t tell you what sounds good.

The best way to tune your guitar to make it sound good for the part, is to make it sound good from the start. To do this, you have to use your ears and listen carefully to how your instrument relates to the rest of the song.


1. Use your tuner to get your guitar into the ballpark of where it should be

2. Hit play on the track that you’re recording to
3. Play the root note (or most common note) of the part.
4. Listen. Does it sound right? could it be more in tune.
5. Adjust tuning. Repeat


This is probably best practice if you can loop a section that you’re recording and spend some time tuning to it. Some parts will be easier to tune to than others, as they’ll have open strings as the main notes, or just a couple of notes in the part, but practice will make you better and quicker at this and you’ll find it easier every time you do it. You’ll also find your parts sounding much better in the mix.


Tuning A Guitar To Itself - An Eye Opener

When I used to tune my guitar, I’d use a tuner, or I’d do the old 5th fret tuning trick and work my way up the strings, getting the tones right with each other. I also used the harmonic tuning trick - the 5th fret harmonic on the low E is the same as the 7th fret harmonic on the A. Same with the next few strings up until you hit the B where you have to go back to normal tuning technique. Both of these work in getting the strings technically in tune with each other, but I found that chords sometimes had a string or two sounding a little out.

This is why I changed my way of tuning. Instead of starting on the low E and working my way up, trying to get fretted or harmonic pitches to sound the same, I started on the G string. I used my keyboard or an App I got called “pitch pipe” and tuned the G to that by ear so that it sounded right. Then I hit the G and the B together and played with the tuning of the B until they sounded right together. This may take a bit of small movements to get it to where you want it. Then hit the G, B and high E together and tuned the high E until it made a nice sounding Em chord. Then I brought in the low E and tuned that until it sounded right with the top 3 strings. I then changed the chord and played the D, G and B together to make a G chord and tuned the D. Finally, I played the A and the high E together to tune the A string. 

This technique might sound a bit strange and all over the place, but essentially I was tuning to open chords in order to make my open chords sound in tune. If you can make your strings work with each other in a way that sounds right in the tuning stage, they’ll sound right when you start playing a song. On the other hand, if you tune individual strings using harmonics, the harmonics will sound right, but they chords might be a bit off. So give this technique a try and see how it sounds for you. You might find it harder to tune two different pitches together at first, but practice it and it will get a lot easier in time and you’ll have a better ear as a bonus.


I hope you guys found this helpful and not too confusing. If you have any questions about the ideas and techniques that I’ve discussed here, feel free to comment and I’ll try to clarify as best I can. Until next time, happy playing… in tune.


-Locky